
Notion is one of the most popular productivity and collaboration platforms out there now. It is used by over 35 million users worldwide (as of 2025) and competes with other apps such as Asana, Obsidian, OneNote, Trello, Monday, ClickUp and Jira.
It can be used to track various aspects of your personal life, project management, collaborate with others in an organization, task tracking, or even use it to run an entire company.
It stands to reason therefore, that there is an incredible amount of data held within Notion, and that data is critical to millions of users worldwide.
In this tutorial, we’ll guide you through the process of exporting your Notion data effectively.
Why Export Your Notion Data?
Notion declares that your data is safe in Notion. That may sound nice and reassuring, but their Terms and Conditions state something different:
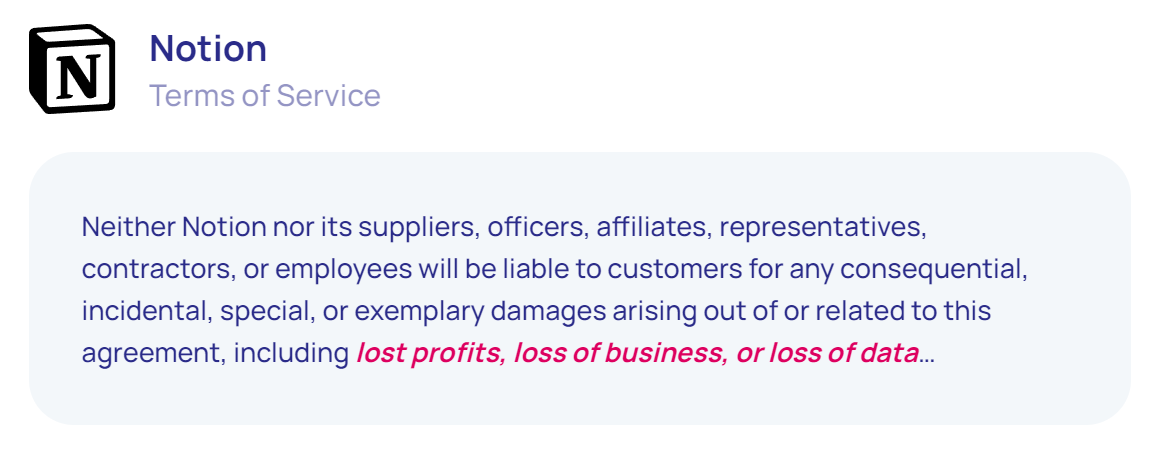
Notion is a cloud-based application. As with all “cloud” systems, it’s just someone else’s computer (or server). Notion will backup your data from an operational point of view in case they have a disaster, but there are various other risks to your data.
Notion operates on the Shared Responsibility Model, common with all cloud providers. Essentially this means that they look after their servers and Internet connectivity, but the actual responsibility for your data remains with you.
The most common reason for data loss is human error. Simply put, data is accidentally deleted. Notion does have a recycle bin, but this is limited to storing your deleted items for 7 days only on the Free Plan. The Plus Plan is not too much better but does give you 30 days to recover deleted data.
In addition to human error, there are other risks such as malicious employees, hackers/viruses, platform issues and compliance reasons such as ISO and SOC2. Only recently a Notion user on Reddit had all their Notion data deleted by Notion themselves.
It is therefore prudent to ensure that you have a copy of your data outside of Notion. Finally, you may wish to migrate your data away from Notion and into another productivity platform.
How to Export Your Notion Data
Exporting data usually takes a few minutes but can depend on the size of your workspaces. Let’s begin:
1. Log into your Notion account via your web browser. Note that exporting features is more straightforward on a desktop than on mobile.
2. On the left hand menu, select the workspace you wish to export.
3. Click Settings & members, then Settings.
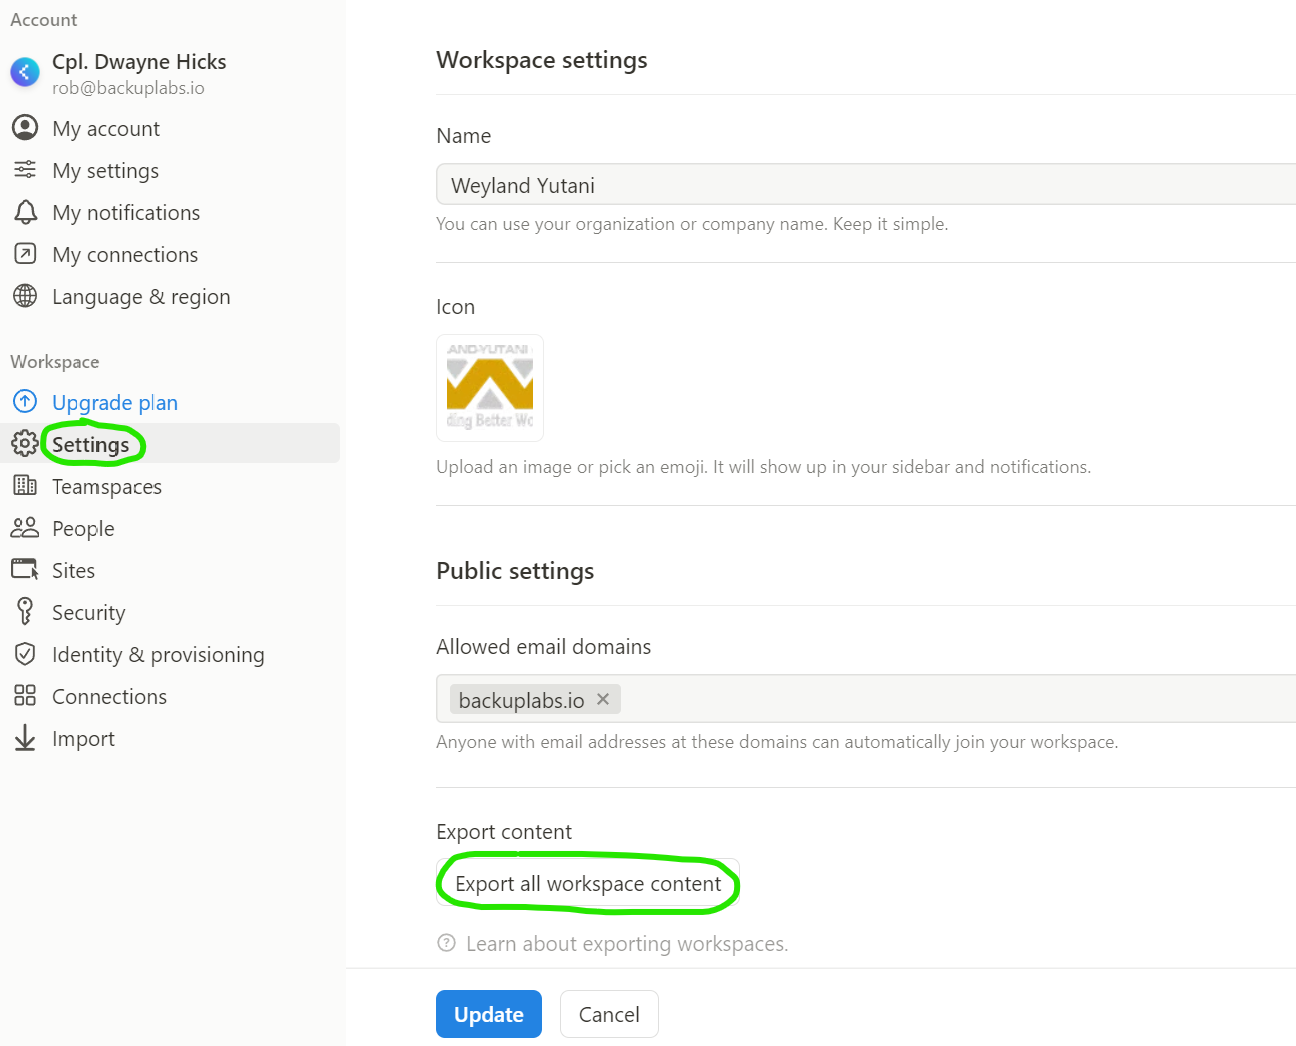
4. Click Export all workspace content.
5. Choose the format you wish to export to (Markdown & CSV, HTML or pdf)

6. Select Export to download your data to your device.
7. You will also receive an email with a link to download your export.
Additional Tips
- Limitations: Keep in mind that some Notion features, such as database properties, may not fully transfer in Markdown format. Review your exported data to ensure everything you need is there.
- Regular Exports: Make it a habit to export your data regularly, especially before major changes or updates in your workspace.
- Restoring: Notion does not yet make it easy to recreate and import data directly back into Notion. There are additional steps that need to be taken to import data.
Automatic Notion Backup
Another method of backing up your Notion data is to use the third-party automatic Notion backup service from BackupLABS. Your Notion data can be encrypted and backed up every day to the BackupLABS secure platform. Backups can also be automatically exported to your own Google Drive for additional protection.

Protect your critical Notion data today with a free 14 day trial of BackupLABS.
Conclusion
Exporting your Notion data is a straightforward process that can save you time and provide peace of mind.
Whether you’re backing up your workspace or transitioning to another tool, following these steps will help you keep your information organized and accessible. Happy Notioning!


