When it comes to modern business operations, GitLab has proven invaluable in transforming how we handle version controlling and collaborative software development. GitLab stands out from its competition as an open-source solution, a collaborative hosting manager for both community and company related software development, making it widely adopted amongst hobbyist coders and corporations for both private and public use.
Its user-friendly interface and powerful features have boosted productivity and streamlined workflows for your DevOps. However, within the remarkable benefits of GitLab, one crucial aspect often overlooked is the need for data backups.
The digital landscape presents unforeseen challenges, ranging from system glitches to security breaches, which could potentially compromise carefully curated GitLab repositories and snippets.
That’s why we’ve created this comprehensive backup guide, designed to equip you with strategies for effectively safeguarding your GitLab repositories. From manual GitLab backup methods to robust cloud-based solutions like BackupLABS, we cover it all.
Our goal is to help you attain a clear and comprehensive understanding of the diverse options for GitLab backups at your disposal as we examine the pros and cons of each solution.
The importance of backing up GitLab data
When it comes to GitLab backups, understanding why you should back up your SaaS app data is vital:
- Meeting regulations and law: Operating digitally means following data privacy laws. Non-compliance can lead to penalties and reputation damage. Industry types such as healthcare and finance, under regulations like GDPR, will require meticulous data protection and reliable backups for accountability in any potential future legal cases that may arise
- Cyber threat defence: GitLab backups protect against ransomware and potential financial losses. They also guard against human error-induced data loss that can disrupt workflows
- Reducing downtime: Even short service interruptions harm operations and user satisfaction. Regular backups enable quick service referencing and data retrieval during downtimes
- Ownership and accountability: Despite using third-party platforms like GitLab, you’re responsible for your data. Backups demonstrate commitment to data integrity and client trust
- Error correction: In software development, errors can happen. Backups let you rectify inaccuracies swiftly, minimising downtime and financial impact
How to back up your GitLab data?
There are several methods for backing up your GitLab data. From traditional manual backups through your web browser to more technical approaches like scripting and personal server management. While free solutions can be appealing, they often lack reliability and require manual effort.
Cloud solutions, on the other hand like BackupLABS, are automated, robust, and user-friendly even for newcomers. Plus, there is no need for manual intervention.
Let’s take a look at the various backup methods available so you have all the information you need to make an informed decision.
Method 1: Manually export and download from GitLab
A simple and traditionalist manual method of exporting and downloading your own archives locally.
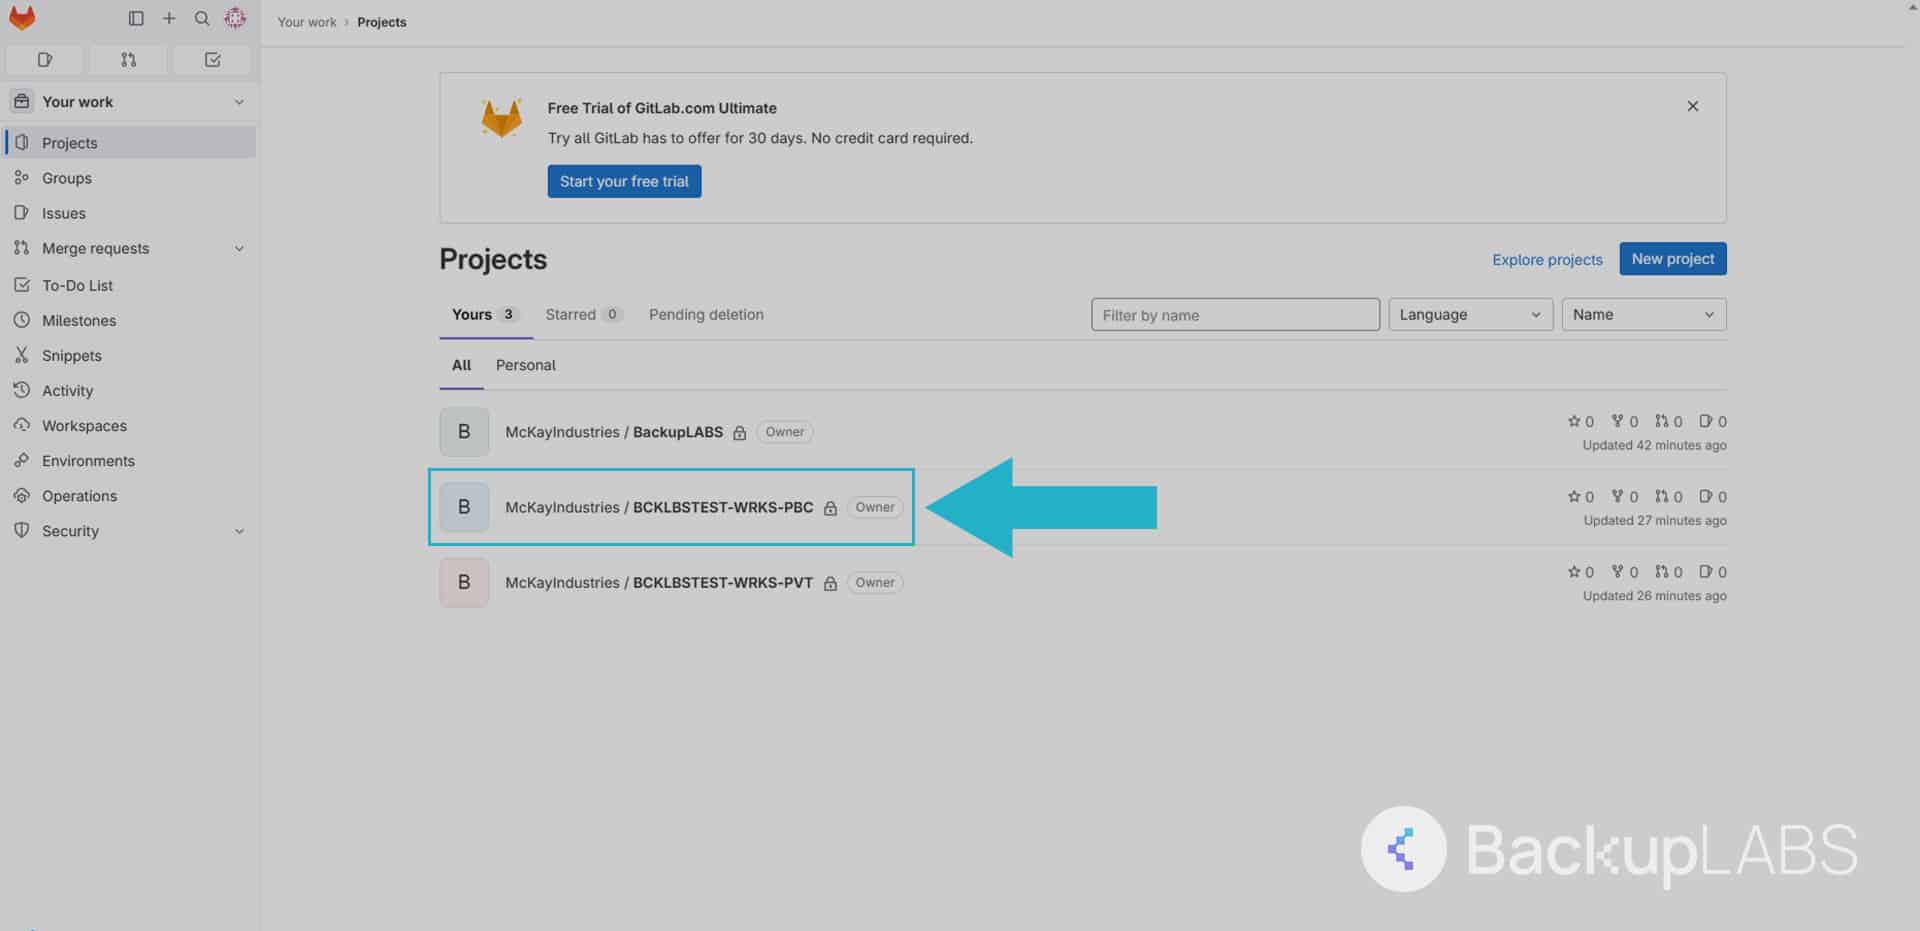
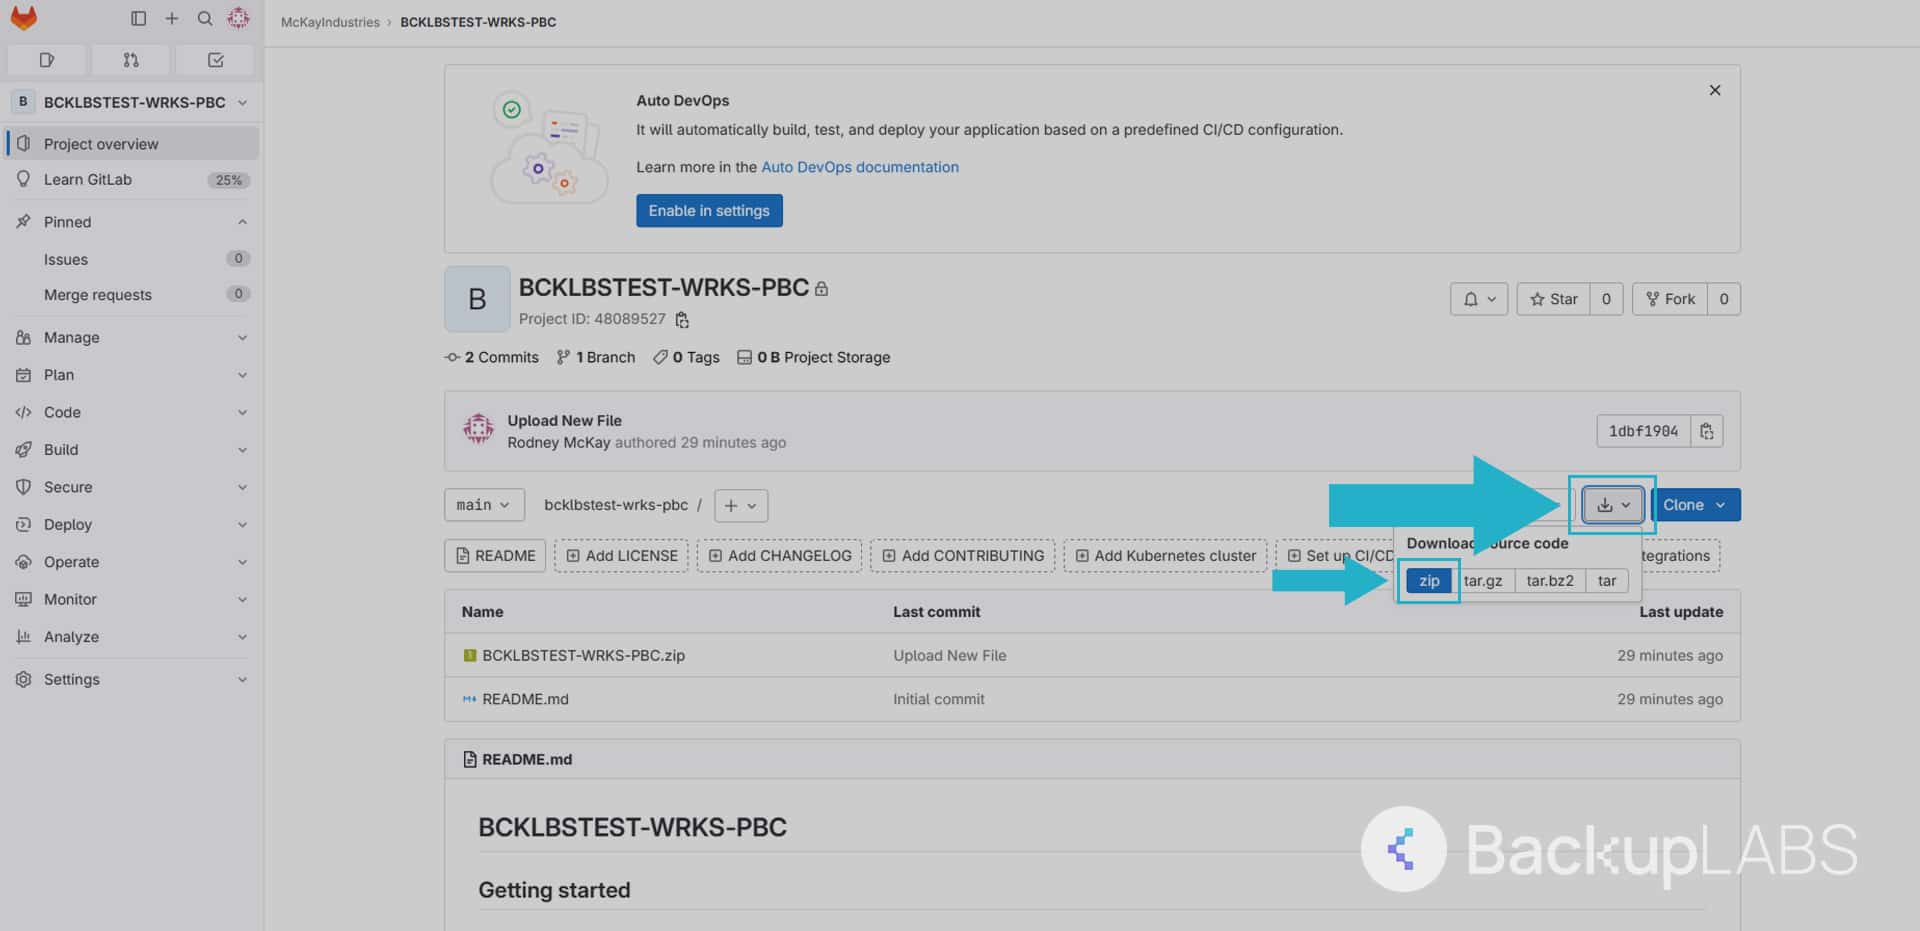
For Repositories
1. Inside your project, select your repository
2. Locate the download icon (next to the clone button), then select zip
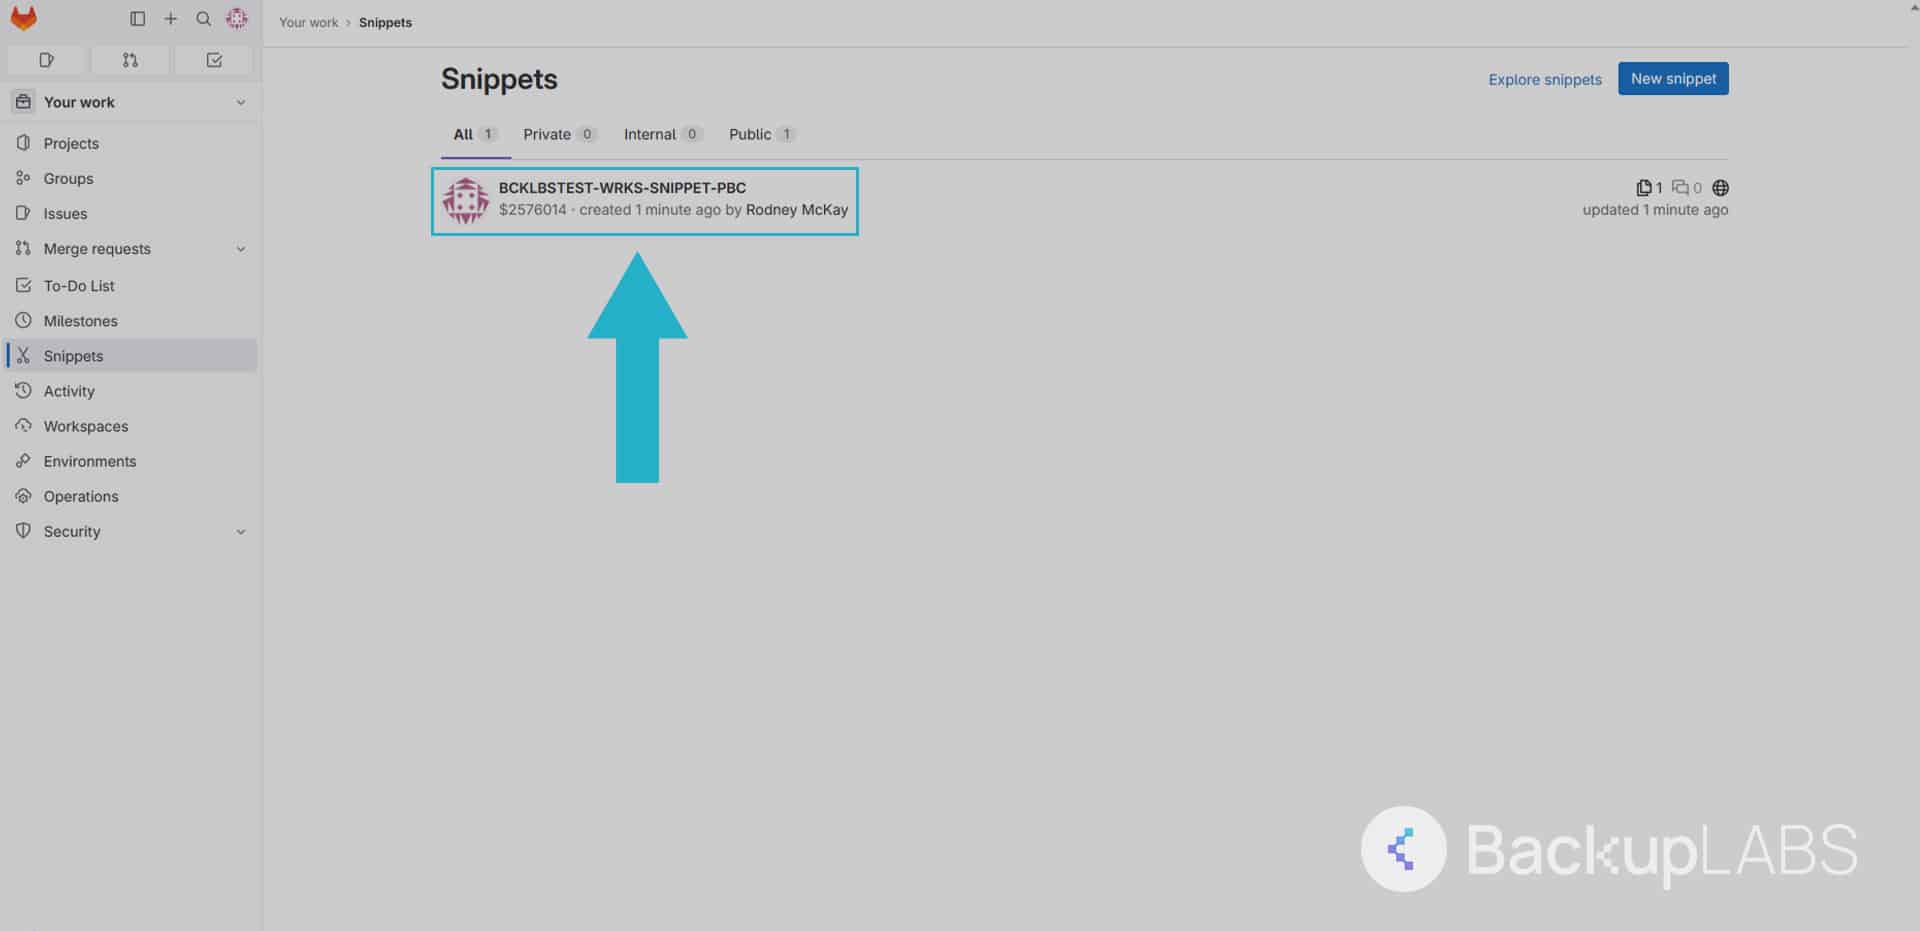
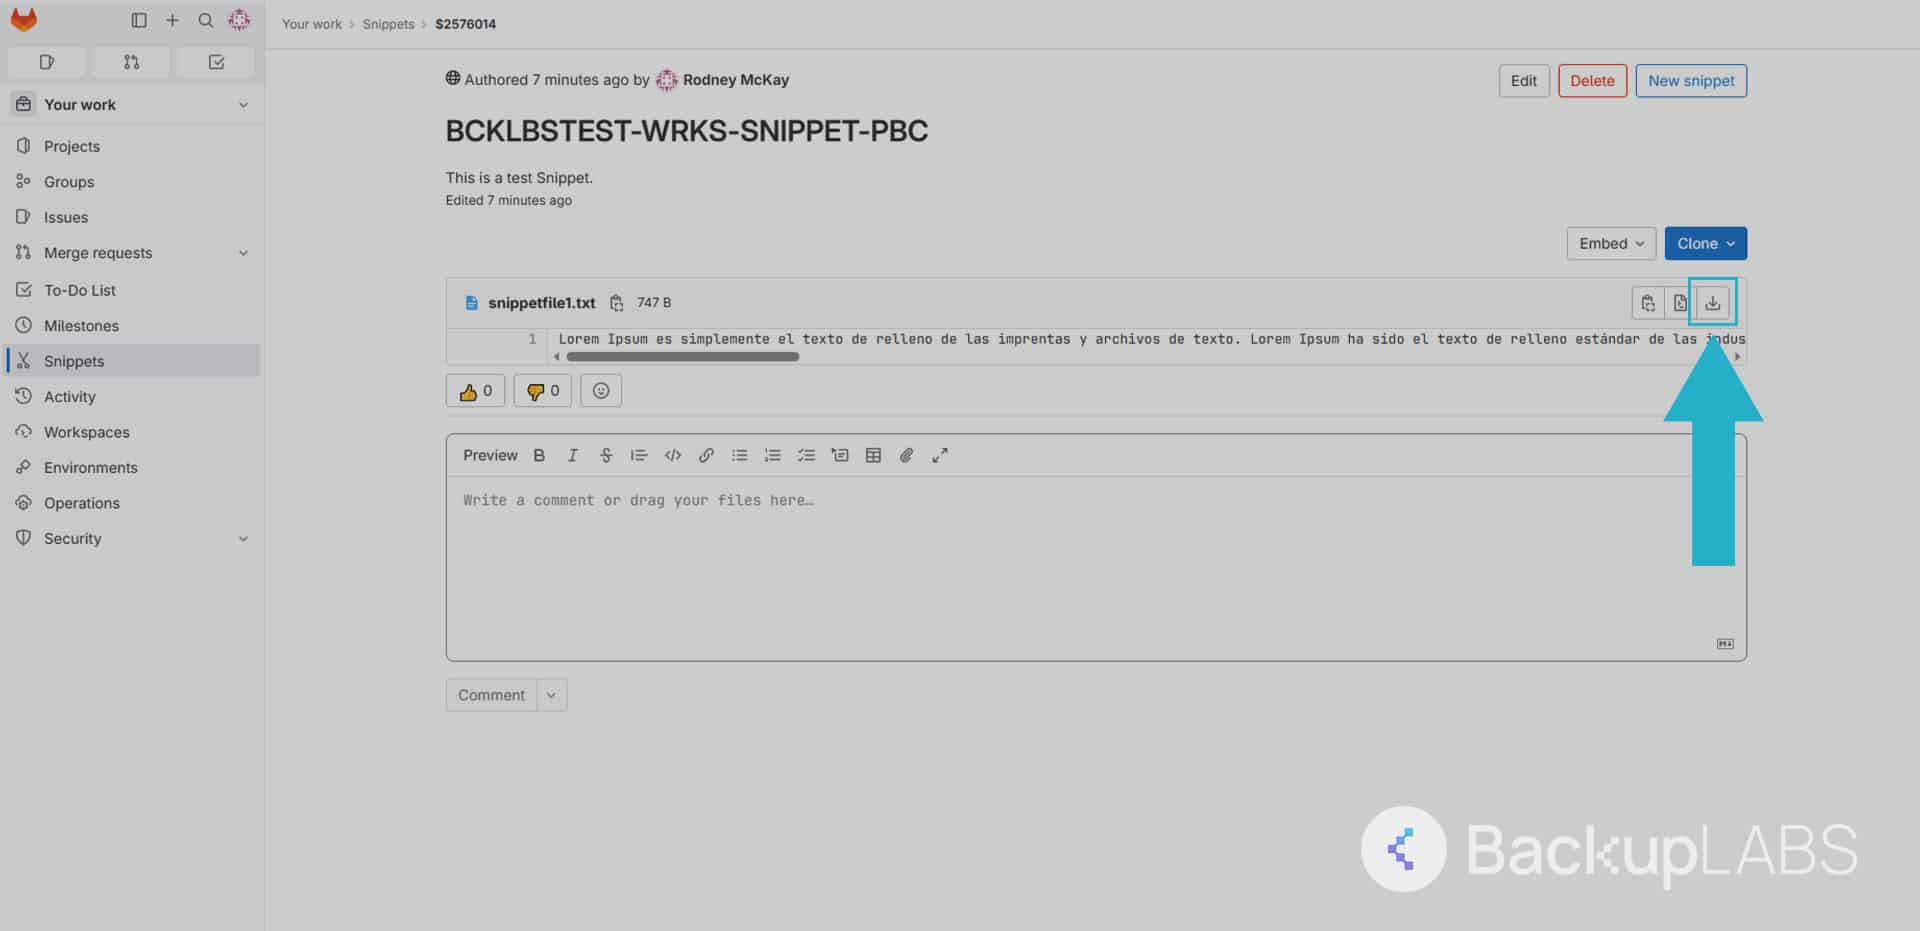
For snippets
1. Using the side menu, select snippets
2. Under the clone button, on the description area, select the download button to save the text file
Pros:
- Simplicity: Easily download the archive after making changes to your repository
- Cost-free: No charges are involved in this process
- Off-site security: Locally securing backups adds a second tier of protection. Your repositories remain safe in case of online issues, GitLab downtime, or potential lockout of your account.
Cons:
- No metadata: Archives contain the original repositories without any additional metadata—snippet recovery yields only the text file
- No automation: Lack of automated scheduling requires self-maintained schedules. Neglecting this could lead to missed crucial updates
- Incomplete: Inadequate comprehensive revision history and project data comparison. Unsuitable for effective restoration
- No restore option: GitLab lacks repository or snippet restoration features. Data re-entry or amendments are a manual process
Method 2: Manually backing up your GitLab repositories to your server
This method involves SSH (Secure Shell) to create Tar files, similar to zip files, a compressed archive format.
SSH provides a secure way to access servers and execute commands remotely. A method for managing servers virtually as an admin via command line instructions.
- Open a SSH session and login to your GitLab account through your personal server
- Start the backup process
sudo gitlab-rake gitlab:backup:create - The following example allows you to skip any directories you don’t want included in the backup. Just remember, skipping directories may not be the best idea for a complete backup.
You can learn more about including more metadata here: https://docs.gitlab.cn/14.0/ee/raketasks/backup_restore.html#back-up-gitlab
sudo gitlab-rake gitlab:backup:create SKIP = db, uploads - The backup once completed will be saved as a Tar file and will be located here:
/var/opt/gitlab/backups
Pros:
- Ownership: Enjoy peace of mind by having your backups on an external server, away from your main account
- Metadata inclusion: This method enables the inclusion of metadata, something lacking in the manual download approach explained earlier
Cons:
- No restores: Restoring to your GitLab account is still not feasible using this method. Backups can only be restored to your personal server via SSH
- Coding skills required: Proficiency in coding is necessary to not only to execute commands but also to comprehend and modify them as needed
- Incomplete backup: This method doesn’t guarantee the full inclusion of a repository’s metadata. Inadequate attention may lead to losing significant historical data and information from your backups
Method 3: Amazon S3 – Automated GitLab backups from your server
Amazon S3 simplifies complex tasks for projects and clients through object containers called buckets. A widely adopted, scalable storage service for developers and companies alike.
It offers various encryption levels and protection, although costs are incurred. This particular method can automatically save your backups to S3-compatible storage providers via SSH, using a private server only.
- Run the following command as the git user. This will start GitLab’s own backup feature along with the necessary permissions
$ cd /home/git/gitlab
$ sudo -u git -H bundle exec rake gitlab:backup:create RAILS_ENV=production - Once it has collated your repositories, you may want to clean out what you don’t want as it will be a big file due to all the revision history. The following example command will delete backups in that archive that are older than 30 days
$ find /home/git/gitlab/tmp/backups/*.tar -mtime +30 -exec rm {} \;
Note: It will now know the user has access to this area:
/home/git/gitlab/tmp/backups/ - Next you need to configure Amazon S3
$ sudo apt-get install s3cmd
- Add your details
$ s3cmd –configure - Use Amazon’s AWS Identity and Access Management System to create your API keys. Note, you may have to set up a new bucket if you don’t have one
$ s3cmd sync --skip-existing --delete-removed /home/git/gitlab/tmp/backups/
s3://[your_bucket]/gitlab/backups/ - The last step is to establish your cron jobs. Use the following to run the editor
$ crontab -e
Remember, cron jobs run on time intervals so remember to configure it properly. Here’s an example:
0 2 * * * cd /home/git/gitlab && sudo -u git -H bundle exec rake  gitlab:backup:create RAILS_ENV=production

0 3 * * * find /home/git/gitlab/tmp/backups/*.tar -mtime +30 -exec  rm {} \;

0 4 * * * s3cmd sync --skip-existing --delete-removed  /home/git/gitlab/tmp/backups/ s3://[my_bucket]/gitlab/backups/
Pros:
- Enhanced ownership: This approach offers two levels of off-site backups, reducing redundancy and granting ownership outside of GitLab
- Inclusive metadata: Unlike manual downloads, these backups are more comprehensive, including crucial original metadata
Cons:
- Server requirement: Running this method necessitates an independent GitLab-installed server
- Limited restores: Restoration is only feasible back to your server
- Additional costs: Backup volume affects storage expenses
- Responsibility: Ongoing maintenance is essential since it’s not automated or managed
- Coding proficiency: Lack of Linux or SSH familiarity risks backup quality and execution
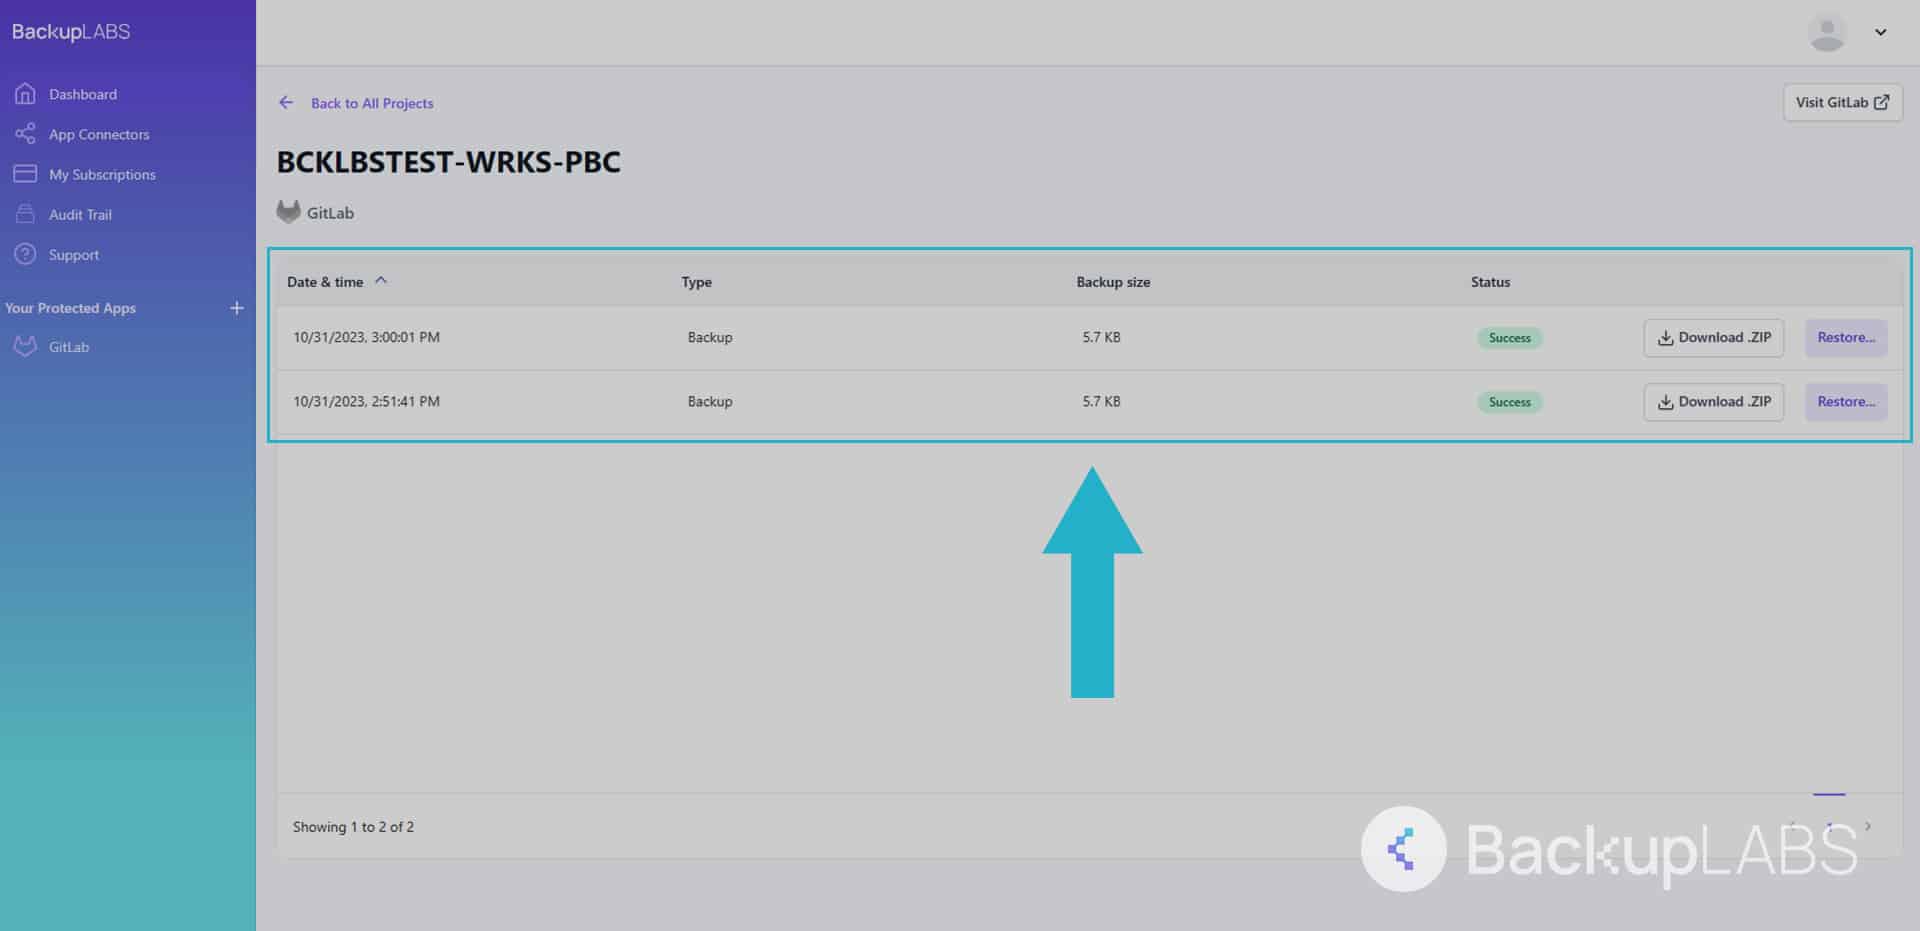
Method 4: BackupLABS – Automated GitLab backups
An automated cloud-based solution, offering a user friendly experience with full autonomy and meticulous detail for companies and creators a like. Any business will save both time and money protecting their repositories using this method.
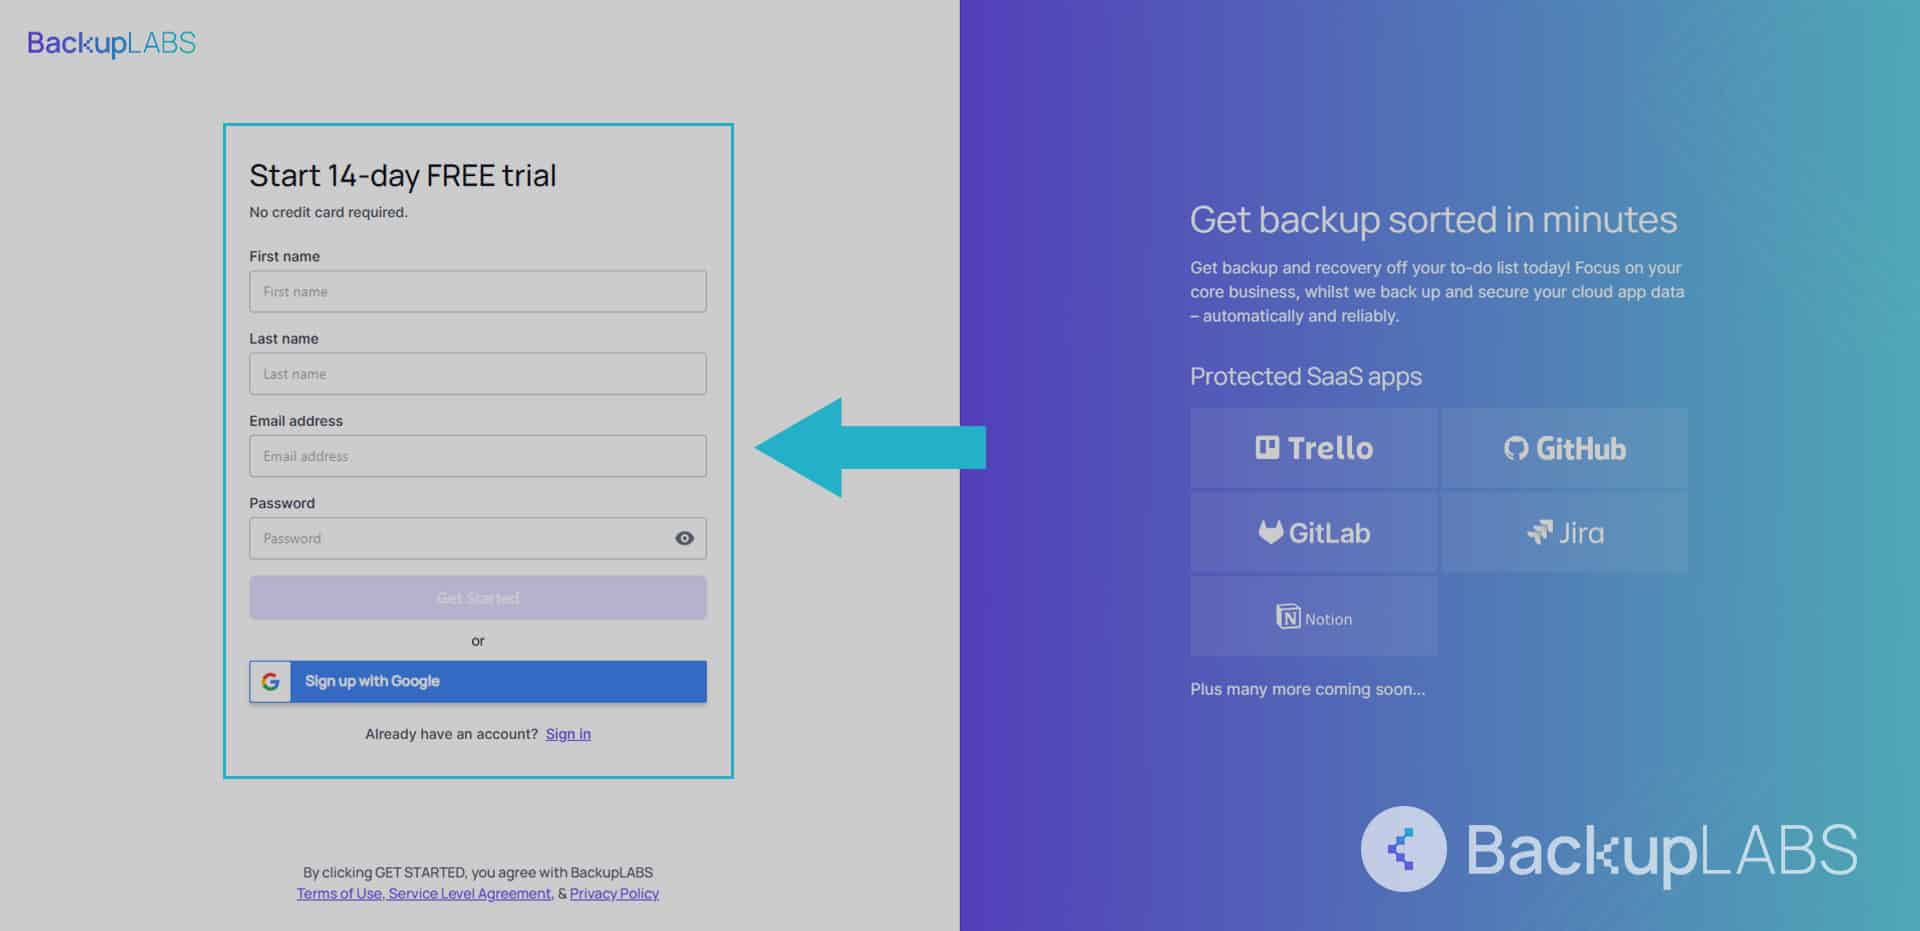
1. Create a BackupLABS account
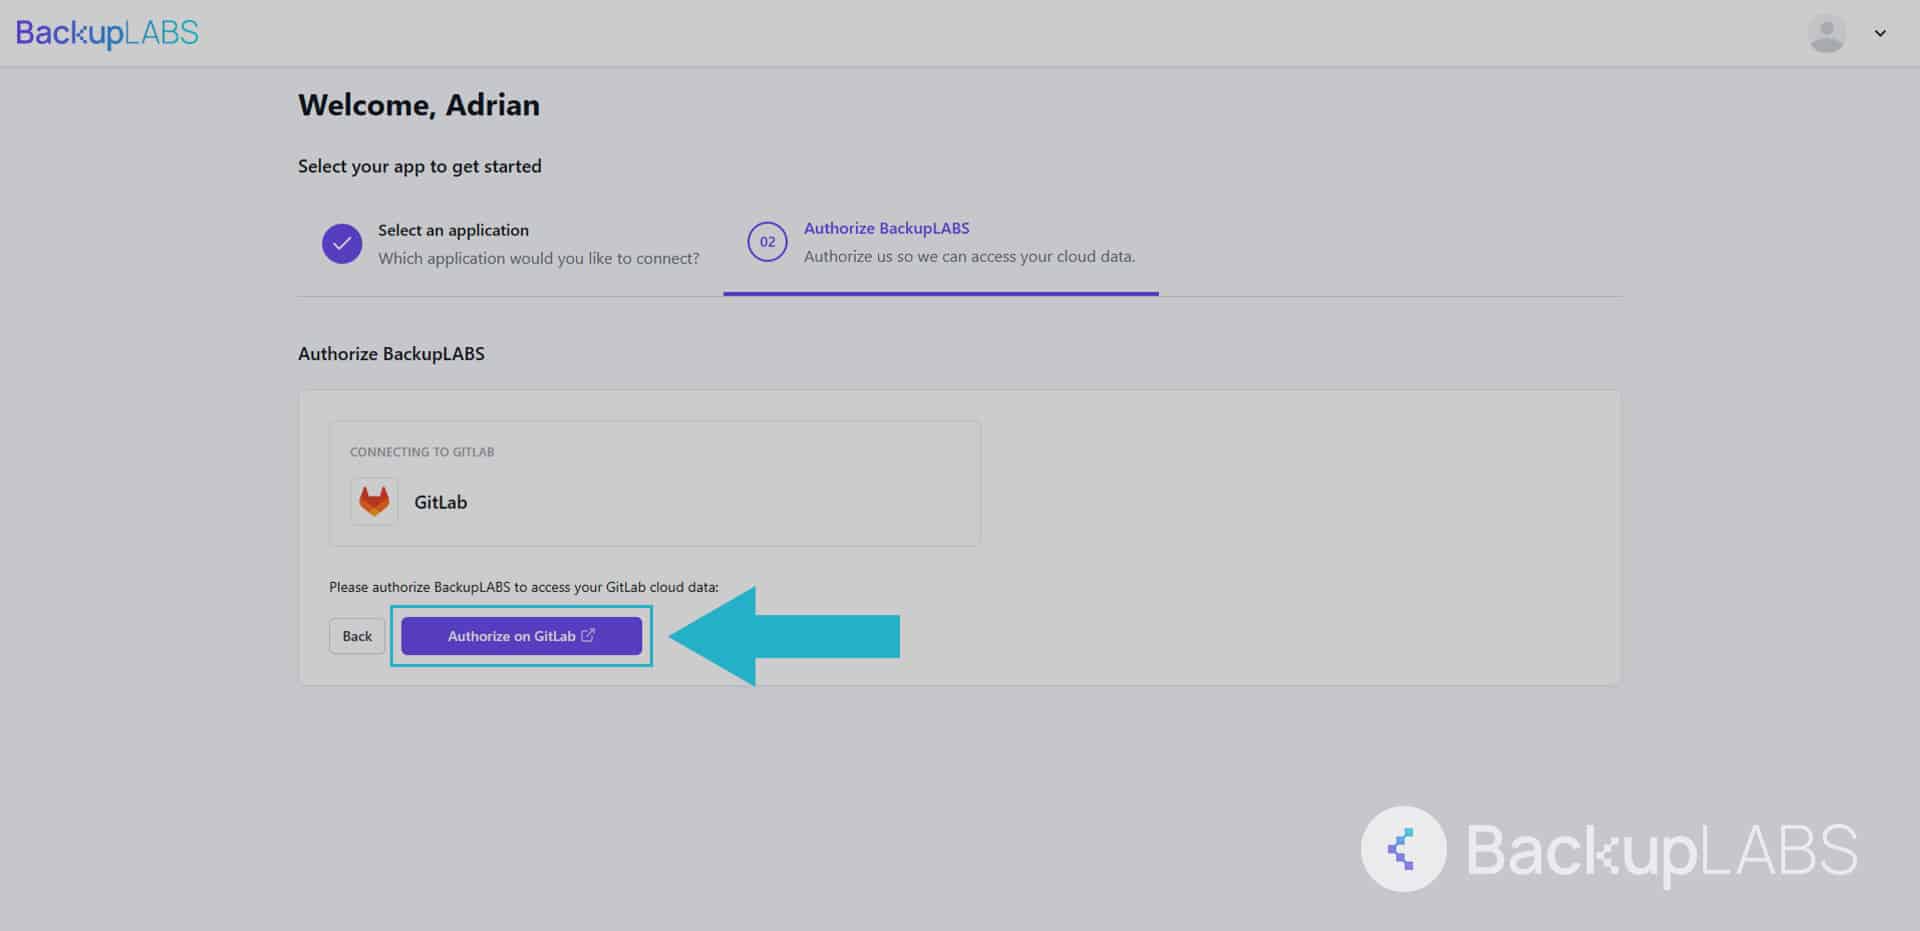
2. Authorise your GitLab account with BackupLABS
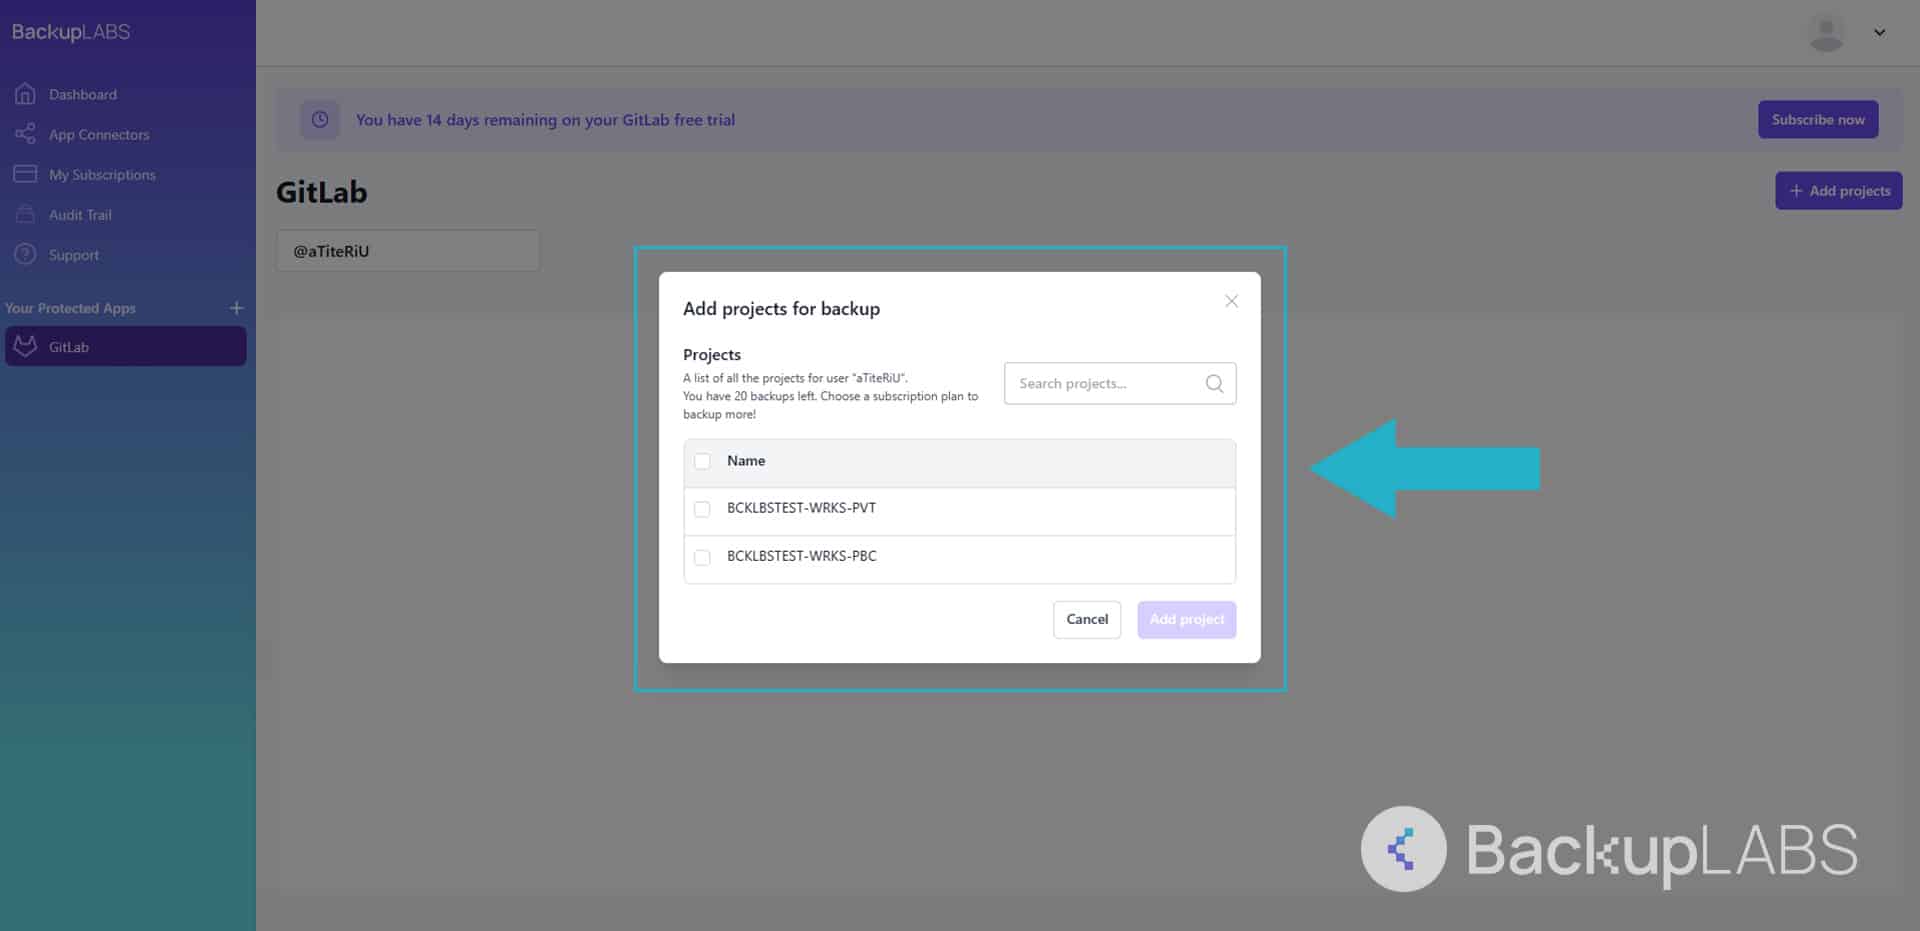
3. Add as many of your repositories and snippets as you’d like
4. Access your backups at any time.
Why use BackupLABS as your backup solution?
With BackupLABS, you can enjoy a reliable and feature-rich cloud backup solution for your GitLab repositories and snippets while benefiting from excellent customer support and robust security.
BackupLABS offers a comprehensive backup solution with the following features:
- User-friendly: Unmatched simplicity and ease of use
- On-demand backups: Account-level backups are available anytime, with no restrictions
- Revision history included: Each backup retains a complete revision history
- Encryption: Robust security with encryption key
- Ownership with manual download: Download at your convenience your own copies for ownership assurance
- Instant bulk restores: Swiftly restore multiple files from your backup archive
- Instant cloning: Quickly create clones as part of restoration
- Comprehensive metadata: Thorough metadata supported for both backup and restore
- Responsive support: Ready-to-help customer support
- File renaming support: Flexibility to rename your restores for easier management
- Security alerts and notifications: Keep informed with security alerts
- Website security and compliance: Compliant with SOC2, ISO-accredited, and more (details on the main website)
Try BackupLABS for yourself, sign up for our 14-day free trial.
